I’ve never taken a liking or interest for puzzles or chess,
or any thinking games. No one has ever told me that I should, or showed to me
that puzzles are fun, or has educational benefits, or can make a person
smarter. From what I can see, puzzles are anything but fun. How can arranging
things to make a picture seem fun? (That alone should show you how I suck at organizing
and arranging stuff. Yikes.)
But that all changed when I became a parent myself. You know
how a mom always wants the best for her child? I thought “I can’t let my child
become a dumb-ass like me!” or somewhere along those lines. I knew that play is
a child’s work, so I started researching on smart and educational play. I mean,
why let them merely play, when they can play and learn and become smarter
individuals at the same time? You know, kill ten birds at one time. Moms are
nothing but time-saving, efficient multi-taskers.
I started exposing my kids to puzzles from they were about a
year old. I bought 2-3 pieces large puzzles of animal pictures for my daughter
to assemble. At first she doesn’t know how to match the head of the animals and
their bodies. I’d have to show her which is the cat’s head and its body, the
fish’s head and its body, and so on. But after several attempts, she seemed to
catch on. She would try and match the heads and bodies and see if they fit.
Then when it doesn’t, she takes another piece and tries to fit it, until she
finds a perfect match. It’s amazing to see a child that young being able to
match something correctly. These all happened before I started researching on
the benefits of puzzles.
Physical benefits
Young children are learning and developing fine motor
skills, meaning the ability to make small or fine, controlled movements.
Puzzles are a fun way to improve their motor skills i.e. the ability to pinch,
pick up and grasp small items which are important for writing later on. You
know how babies and young toddlers are always picking up small items on the
floor such as buttons, coins, dust particles and leftover foods? Yeah, that’s
gross motor skills in action. Puzzles are a much cleaner and safer way to
learn, don’t you think?
Another physical benefit apparent in playing with puzzles is
the hand eye coordination, which involves the coordinated vision and hand
movement to execute a task. We as adults may not think twice when picking up
something or writing with a pen, but a young child has to learn to do this.
When assembling a puzzle, the child places each piece in the puzzle and
manipulating it to see if it fits. This trial and error process is also
enhancing the hand eye coordination.
Intellectual benefits
Puzzles are a way of stimulating the thinking side of a
child’s brain, focusing on problem solving and reasoning skills such as process
and logical thinking. As your child tries to fit and match the puzzles, they
realize that there several ways to attack a problem and experiment with ways
that works best for him.
Puzzles also improve a child’s cognitive skills, i.e.
learning to understand how the small puzzle pieces fit together to form a
complete puzzle set. Depending on the puzzle theme, they’re also learning specific
subjects such as alphabets, numbers, animals and colours, among many others.
My daughter arranging puzzles on her own.
Emotional and social benefits
You know how it feels to accomplish something? How
satisfying that feels? Children feel that too. You can see how absorbed and
determined they are, trying to fit them together until they match. And when
they finally finish the puzzle, they clap and cheer to acknowledge that sense
of achievement. The accomplishment and the praise by the audience (adoring
parents, of course) increase self confidence.
Puzzles are the one of the best family or social games
around, just like card and board games such as Monopoly and Uno. Fitting a
puzzle requires cooperation and thinking as a group, which is also a great
bonding tool. As parents guide their children on matching the puzzle pieces,
they could also encourage them to try again when the child gets it wrong,
encourage them not to give up and think around the problem, teach them how to
handle frustration. Quality time with your kids, and learning so many things at
the same time. That certainly beats your child hogging your Ipad playing Angry
Birds for hours.
So
keeping in mind all these benefits, it’s about time that you start buying some
puzzles for your kids, don’t you think? ;)
I originally found this at Muffin Tin Mom website, and I think
it’s quite simple to make, using cheap stationeries, so I decided to give it a
try. I did it from scratch in about an hour or so, while the kids were taking
their afternoon nap. I already bought the materials beforehand for quite a
while now, but I never had the time to do it (or possibly, too lazy to think about
it. Hah!).
So, laying out the materials.
A large cardboard in any colour you prefer. I chose orange
to make it nice and bright.
A stack of paper. You can use normal A4 paper if you like
(or if you’re more cheapskate than me), or buy some nice cardstock like I did. You
can even cut up some boxes and then paste the alphabet card on it, to make a
sturdier card.
A strip of Velcro, scissors and coloured pens, if you’d like
to colour and decorate the cards. I didn’t have time to do any decorating as my
kids woke up just as I finished.
I forgot to take photos of my own stickers. Hmmph.
2 sets of alphabet stickers. You can just print out 2 sets
of alphabet flashcards from the internet, or buy some, if you like. It would
save more time, as you won’t need to cut up the paper or paste stickers. Up to
you, really. My kids love stickers, so I decided to buy some.
Ok, let’s start!
This is the fast and easy way to cut up the paper. (I’m
racing against time here, remember?) Fold the paper in two and cut it up. Then
fold the long strip of paper into four and cut them up. One sheet of paper can
produce 8 little cards, just about the size of a flashcard. You don’t want it
to be too big, it’ll take up too much space on the cardboard.
As there are 26 alphabets, you’ll need 52 little cards in total.
(Did you have to count how many letters are there? Heh.)
Here’s the fun part – pasting the stickers on the cards. Go ahead,
it’ll bring out the child in you, I promise! And you’ll understand why kids
love stickers so much.
I have no idea why this picture came out vertical like this. Can someone tell me how to fix this?
Before you start sticking the Velcro on the cards and on the
cardboard, I think it’s better to arrange the cards on the cardboard first,
just to be sure of the placing. Good thing I did, I couldn’t fit all the
letters on one surface, so I had to continue on the back. As you can see from
the Muffin Tin Mom, her cardboard is bigger so it could fit all the letters. Or
maybe my arrangement is a little off, I don’t know. It’s okay, we’re not trying
to be too precise, it’s an activity for kids anyway. Unless you or your kids
have OCD.
Then cut up the Velcro strip into small pieces. For people
who have never used Velcro before, (like yours truly) you might wonder why
there are two strips. One strip is the hairy one and the other is the rough
one. They only stick on each other i.e. if you try to stick the hairy piece
onto another hairy piece, it won’t stick. So you need to stick the rough ones
on the large cardboard and the hairy ones on the back of each little card.
Okay, go ahead and stick them all.
Like I said, I had to continue on the back.
Unlike the Muffin Tin Mom, I forgot to make the small open
box the put in the second set of cards. Oh well.
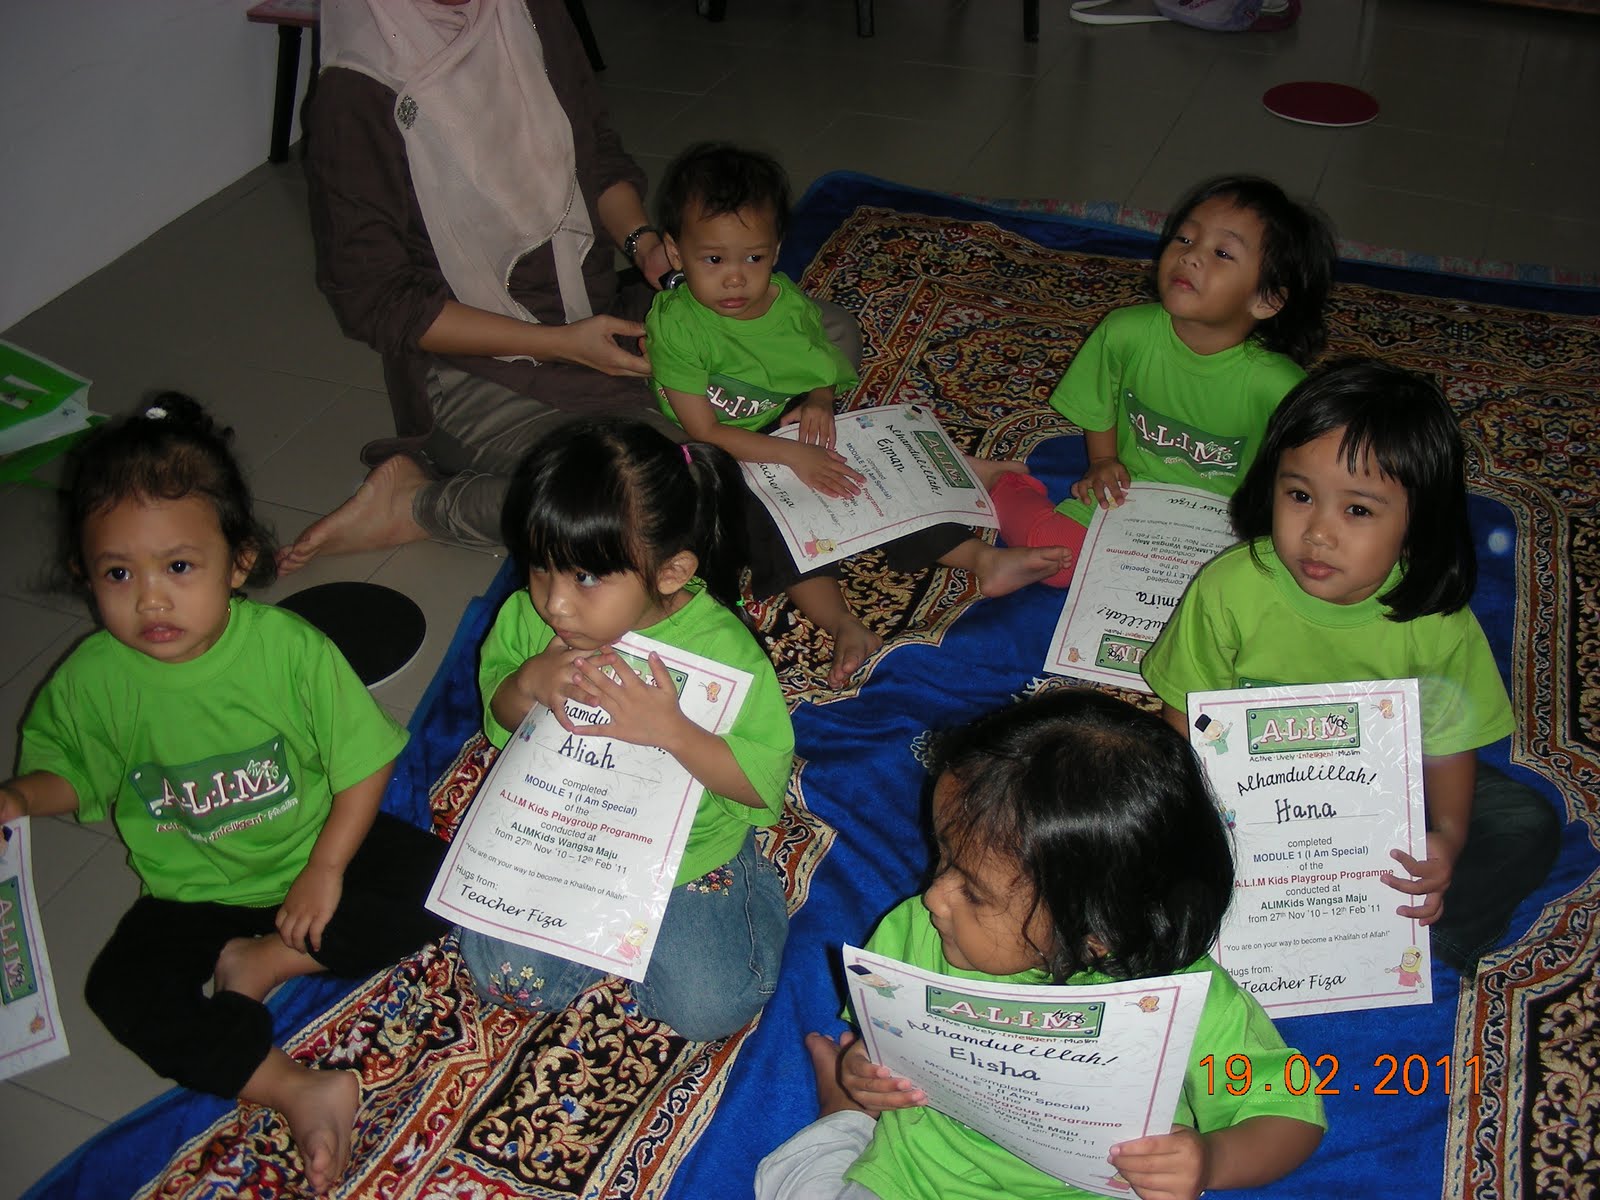
I’ve been sending my 3 year old daughter, Aliah to a nearby playgroup, ALIMKids, for about 6 months now. The playgroup is held on Saturday mornings, perfect for working parents like me. Despite the belief that playgroups are for stay-at-home parents to be able to get together with other parents with their children in tow, my ultimate reason of sending my daughter to a playgroup is for her to socialize with other kids her age. As she stays at home with her little brother and my maid all week long, I thought it would be good for her social skills, besides the fun things she could do and learn at the playgroup.
As my kids age gap are quite close (their birthdays are 20 months apart), the sibling rivalry is pretty intense i.e. a lot of fighting and bickering and pushing, and of course, bawling. The playgroup actually teaches my daughter to share things, take turns at doing something and learn some manners and the appropriate behavior with her friends. In turn, she teaches her little brother how to share. It’s really funny to see them ‘sharing’ a toy; they weren’t even playing, they just keep passing the toy back and forth to each other!
As a working parent, I have to admit, it’s difficult to find time to do activities with your kids by yourself. Just imagining myself sitting with them, painting and scribbling, gives me a headache. Because they definitely won’t sit down quietly; they’ll bicker over the crayons or paints, or even worse, run around the house and mess up the walls, sofas and the tv! A child may not be allowed to use scissors or make messes at home, but painting, scribbling, cutting, gluing and messes are definitely encouraged at playgroups.
Activities like these are best supervised by parents, but knowing the busy moms nowadays, who would have the time to play all day when you have cleaning and cooking and laundry to do? At playgroups, the playtime is somewhat structured; you sing first, then do some crafts, then you put away the crafts and do some physical play, then finally a group reading. When it’s time for the next activity, the children would clean up to get ready for the next task. For example, when a child wants to keep on colouring, she sees her friends cleaning up and gathering around the teacher to read a book, she quickly cleans up too, not wanting to be left behind. It’s like the children are automatically conscious of their peers, making them want to blend in, do the same things together, conform to each other and work as a team.
It’s kinda funny, but I myself look forward to these Saturday playgroups, which means exclusive bonding time spent with my daughter. This exclusive time is pretty scarce, as both my kids are endlessly fighting for my attention (sounds flattering, I know. But believe me, it’s a lot of headache.). It’s nice to be able to focus on her alone, see her play and sing and scribble. This one hour is also like a break for me from things, stuff, tasks – to do at home.
Here are some of the activities they do at the playgroup, which are mostly group reading, craft play, alphabets, singing and some physical play.
Group reading
Singing and dancing with body movements
Messy crafts such as finger painting
Playhouse
Even birthday celebrations
Making music
Lots and lots of colouring
Ribbon play
A special activity done by ALIMKids – Parachute play
The truth is, I’ve never seen a parachute play before encountering this playgroup. So I feel that it’s worth a brief explanation in itself.
Benefits of Parachute Play
Encourages cooperation, teamwork and creates a group awareness
Non-competitive - Differing abilities and even differing ages are non-issue. It focuses on playing, not winning
I highly recommend enrolling your kids to a playgroup like this. It’s a fun and great social environment plus informal learning for your child. It’s also a great bonding experience for you and your child. What’s not to love?
When teaching your toddler to swim, the 3 most basic things to teach would be:
Blowing bubbles
Going underwater
Floating
Blowing bubbles
When you teach your child to blow bubbles, you’re actually teaching him to blow out the breath while underwater, which is the proper form while actually swimming. People who have never joined a real swimming lesson would say, swim a breaststroke, while holding the breath while being underwater and blow out the breath when the head breaks the water surface (like myself, before I joined a swimming class. See, even a clueless adult can get this wrong). It’s actually the reverse; you take a deep breath, dip your head into the water and blow out your breath in bubbles while underwater.
Firstly, teach your toddler to blow soap bubbles, which is great fun!
Once he’s got the hang of it, you can try and get his face close to the water and blow something across the water, say a boat or a rubber duckie. When he’s comfortable enough, you can show him to blow bubbles underwater. You can demonstrate by taking a deep breath, put the lower half of your face into the water and blow out bubbles.
These gradual steps ease the fear and pressure off your child, while increasing his confidence with water. Most children love to play with water, by getting your head underwater is whole different story.
Going underwater
There are basically 2 ways to go underwater, by holding your breath or by blowing out your breath (duh). In my opinion, blowing out is easier for a child than holding the breath. Some kids simply do not understand how to hold the breath! It’s better if you can make a game out of it, say holding your breath and blow out three candles at once. Or using the earlier example, hold your breath and blow a rubber duckie as far as you can across the pool.
Once he can do this, then you can teach him to hold the breath, while you pour water over his face. Another way is to hold the breath before you pour the water, and blowing out when you actually pour the water. When he masters this, then you can proceed to telling him to hold his breath, and gently dipping him in the water.
Holding the breath is one of the most basic skills needed when one learns to swim. If you have ever enrolled yourself in a swimming lesson or you’ve tried swimming on your own, the first thing you do to swim is hold your breath, head underwater, arms up and straight in front of your head and kick your legs. Teaching your toddler to hold his breath is a preparation for this, sparing him the unfortunate swallowing or inhaling water through the nose or mouth, which can be very painful and traumatic. It could even scare your child off from trying to hold his breath again.
Floating
A basic back float can be a life saver if a child accidentally falls into a pool or a lake. The key to floating on your back is to relax. Fear and panic will definitely bring him down into the water. This is why teaching a baby to float is much easier, because babies are more relaxed and feels comfortable in water, due to their previous water-like surroundings in the mother’s womb.
To ease this fear, you could help your child to float by laying him gently on his back in the pool, with his head resting on your shoulder, one of your hands on his back in the water and your other hand on his chest to make him feel more secure. When he’s confident enough in this position, you could move your hand from his chest and support the back of his head. When he’s relaxed enough, gently let go of your hands.
Okay, time to take a picture!
“Going down to the pool” has become a weekly activity for my kids. Both of them had not started swimming yet, but they certainly enjoy just being in the pool, splashing each other and play ball. My daughter, while wearing arm floats, has started floating on her back, which she practically learned on her own. I was watching my boy when my husband, who was taking photos from the side, called out. I turned around and saw her floating on her own. She has yet to learn to go without the float, though.
And there's my little boy.
Just for fun, watch these videos of my kids in the pool. Sorry about the video quality, it was taken from my 2 MP old camera phone. And please excuse yours truly yelling in the background. A mom just gets too excited sometimes. Heh.
It’s about a 5-hour drive from KL to Penang, so I was thinking of buying a new toy for each of child to engross them in the car, so I can relax a little a bit without having one of them climbing on my back (the baby) and the other cuddling like a baby in my arms (the big sister).
I was thinking of toys like these for the baby.
Lamaze: Jacque The Peacock
Taf Toys: Infant Car Toy
Taf Toys: Curiosity Cube
For the big sister.
Read & Play: Dress Up Bear Book
Baby Einstein: 365 Days of Baby Einstein Book
Baby Einstein: Pretty Poems and Wonderful Words Lift the Flap Book
Take your baby for a swim and see her natural swimming instincts.
Most babies (and toddlers and kids) love water. My daughter surely does! Even after I bring her out of the bath tub, she’ll want to get back in again and screams her head off when I bundle her up in her towel. For me, I started going to swimming pools since I was 8 or 9 years old. I learned how to swim when I was 11, without any formal training or classes. So my “techniques” are non-standard, so to say. I’ve enrolled myself in adult swimming lessons to get my techniques right but falling pregnant before I could get to freestyle and my ultimate dream, the butterfly stroke. There are no swimming lessons available for pregnant moms in Malaysia, or at least none that I know of, so I had to quit.
I would love to pass my love of the water to my daughter, but baby swimming lessons are scarce here or possibly non-existent, so I read up on the internet. Some of the well researched benefits are:
Early swimmers perform better on tests of social, academic, motor and personality developments.
Water offers a multi-sensory stimulation involving all senses i.e. touch, hearing, taste, sight and smell. The intense physical and eye contact with parents offer quality stimulation, which means excellent for parent and baby bonding.
Swimming allows babies to move independently and weightlessly through water long before they can walk, aiding muscle development, coordination and balance, lung capacity, stamina and the brain.
Early swimming helps develops babies’ personalities. Cautious babies learn to accept risk while boisterous babies learn to be more prudent.
As a result of all this, their independence and self confidence will increase.
A safeguard against water accidents. No amount of swimming lessons could guarantee a safeguard against drowning, but at least it would increase her survival skills in her times of need.
When to start taking your baby for a swim
It really depends on your own comfort, availability to a pool and your baby’s health. My daughter was terrified of the water until she was around 4 to 5 months when she really began to enjoy herself during bath time. I could tell by the serene look on her face, her quiet cooing and of course, the lack of cries and screams. Then she kept getting colds and a runny nose, so I kept postponing our trip to the pool. We finally got to take her for her first swim in our apartment baby pool in the morning, in order to avoid the noisy crowds in the late afternoons.
What to take with you
If you’re taking your baby to your condo’s pool like me, you can just bring a towel, as you can deal with everything else at home. But if you’re going to a public pool, you should bring pretty much the same things you bring with you during an outing such as:
A bottle of formula and some snacks for after swimming – swimming makes babies hungry just as they make you hungry
A towel or a toweling dressing gown (if you have one)
Water or bath toys such as balls, rubber duckies, plastic turtles or boats etc.
Don’t forget your diaper bag.
Have fun!
Let your baby splash & play with her toys. Throw one across the pool and “zoom” her through the water to get it.
Put your mouth under water and show your baby how to blow bubbles. This is an important lesson for babies to learn, as they can't inhale water if they are blowing. For young babies, blow a toy across the water and get him to blow it back, or at least mimic you blowing.
When he can sit up, usually at around six months, sit your baby on the side of the pool and lift him down into the water with a splash. Do it with older siblings and you’re guaranteed a few laughs and cackles!
Lay him on his back with his head resting on your shoulder and encourage him to kick his legs. My daughter instinctively starts to kick her legs about when in the water, even dipping her head a few times and gasping. Be careful not to let your baby swallow too much water, though.
Precautions
Make sure the weather’s not too cold. It’s unlikely you can get a heated swimming pool just at the right temperature here in Kuala Lumpur, so try to take your baby in the morning before it gets too hot, or in the late afternoon.
As soon as your baby starts to shiver, get him out of the pool and wrap him up warmly. Babies and young toddlers can only stand about 15-30 minutes before they start to shiver, so be watchful.
Never EVER leave your baby unattended, or even let go of your hand of her, not even for a second. This is especially important if your baby is already mobile i.e. crawling or able to turn over on her own.
Take a look at my daughter in action. She's having the time of her life!
Playing ball with a friend.
Keep those legs kicking!
See what I mean? Time of her life!
Now she knows water can get into her ears, hehe.. .
All in all, she had a blast! I ended up with a sore back, though, from all that bending over. Next time I'll bring her baby float.
Tag, probably the oldest game in the world, is a great way to help your child burn off some energy and strengthen his muscles.
Tag is an everyday, favourite game in our family. Of course, for now, Daddy is “it” and Mommy is the safe haven. The game always ends with my daughter flying into my arms, laughing madly. It’s the perfect game for extra hyper little tots. (But then again, aren’t all tots extra hyper?) If you keep the rules simple, even young toddlers can catch on quickly.
Start with classic tag - one person is "it" and the other is being chased.
The key is to coax the child with phrases like, "Come and get me!" and "You can't get me!"
You'll want to slow your pace down to a trot so that your little one actually has a chance at tagging you. You also can crawl or walk on your knees if you want to be closer to your child's level.
When it's time for you to be "it," give your child plenty of time to enjoy being "faster" than you. Before too long, he really will be!
As your child learns the ropes of tag, you can try things like Freeze Tag, where the person who gets tagged must remain frozen in place for a period of time, TV Tag, where the person being chased can call out the name of a TV show to avoid being tagged, and even Flashlight Tag, where you tag each other with a beam of light in the darkness.
You can play tag indoors by designating a safe area in which to run around, such as a living room, playroom or childproofed basement. If you use multiple rooms, designate a space to be a "safe zone," such as the kitchen, where kids can take a break without fear of being tagged.
When playing tag outside, make sure to create boundaries so kids don't run anywhere they choose, and take care to remove obstacles such as lawn chairs or rakes. Use the natural environment to create excitement - run around a tree or scamper through the sandbox - or to serve as natural boundaries - don't run past the bushes!
Playing tag with your children is also fantastic exercise for you (that is, if you can keep up). Now, that’s what we call multitasking.
Once your baby starts to crawl they are able to explore their environment on their own. You can make a simple obstacle course to challenge them which can contain boxes for tunnels, pillows for mounts and towels or other fabrics for texture. Begin by collecting 2-3 large cardboard boxes e.g. refrigerator or tv boxes, ensuring your baby is able to fit through them easily. Remove any tape or staples that may be attached to the boxes and cut off the flaps. Stick the boxes together with tape. Place things such as stuffed toys in the tunnel to create obstacles.
Place your baby at one end of the tunnel and yourself at the other opening. Call out your baby’s name or wave a toy, encouraging your baby to come towards you. Always praise your baby’s efforts and cheer when they accomplish the task.
For a steady crawler, you can add pillows or large, flat cushions so your baby can climb over them. Then spread a towel in front of it so your baby could feel a different texture on her knees. You can pretty much put anything as long as they encourage your baby to crawl e.g. push a toy car in front of her to indicate to her to follow. I used two turned over dining chairs with a huge towel draped over. When my daughter is passing, I'll tug the towel and cover it over her, turning it into a peekaboo game. Babies don't need expensive toys, really. Just use your imagination!